AddEventCalendar
Steps to add Event Calendar (super Admin)
Note : You need to login as Super Admin, After successful login, to add Event Calendar we need to follow steps given.
- Select Inhalt (Content) -> Inhalt hinzufügen (Add Content) -> Event Calendar

-
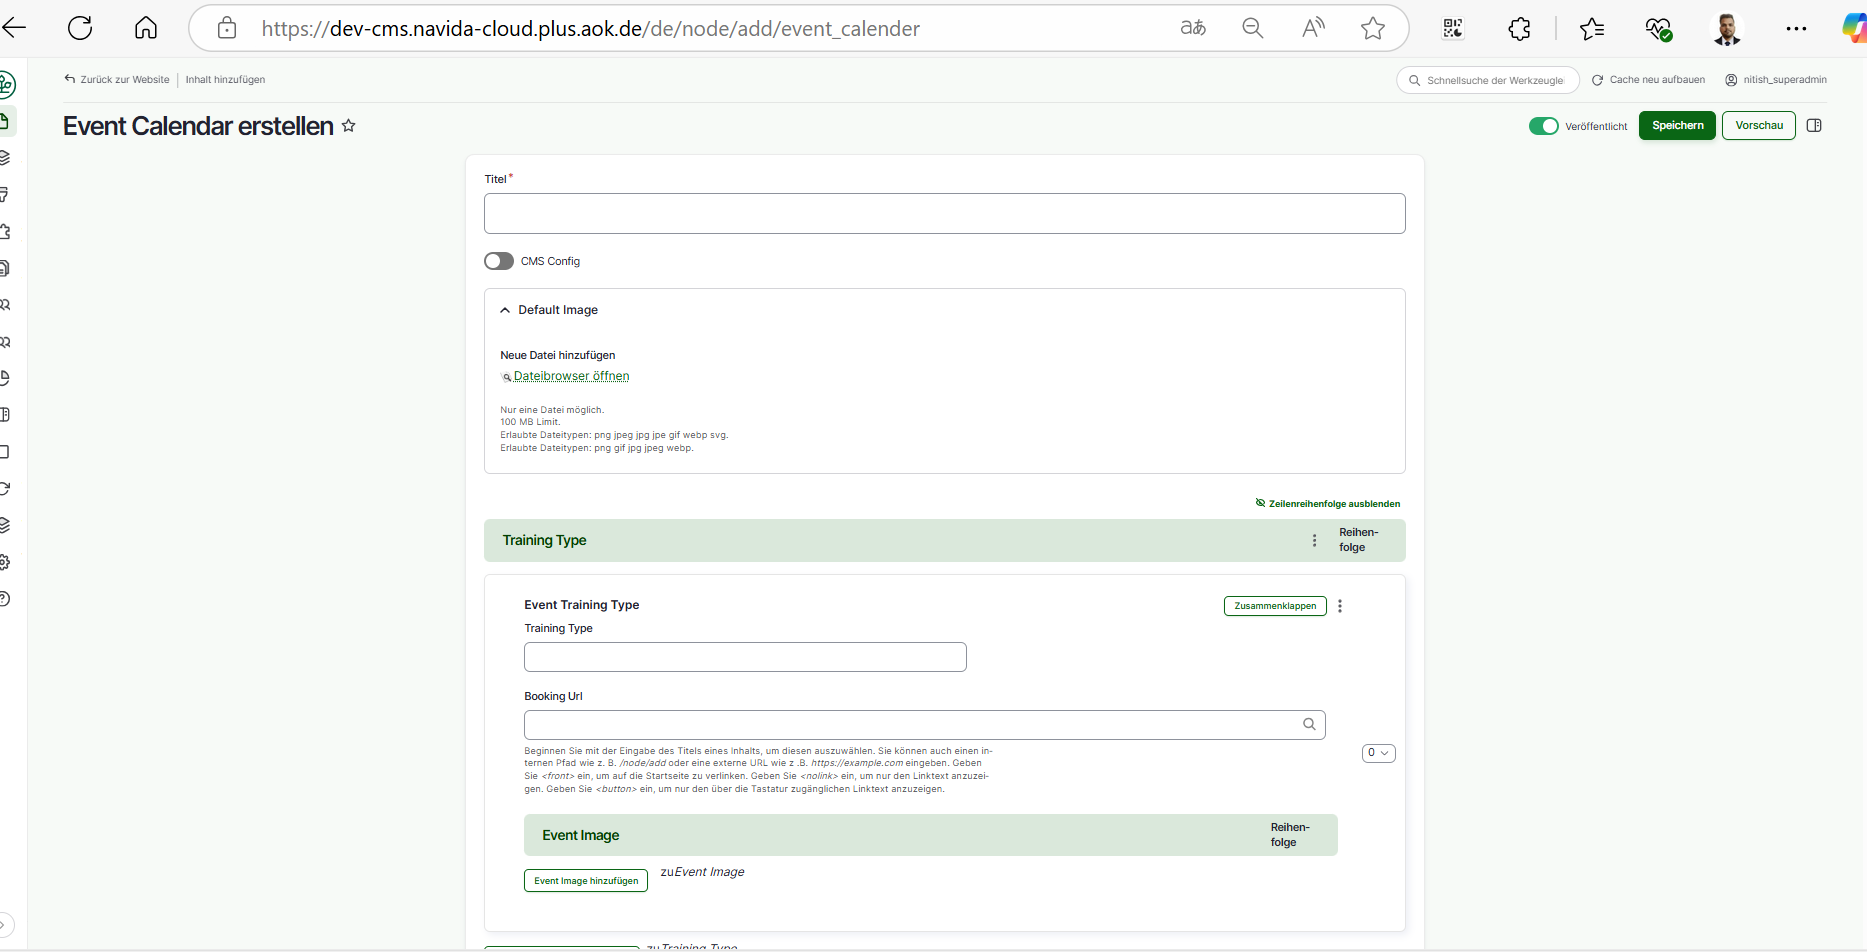
- Add Appropriate 'Event Calendar Title' in Titel .
- Check CMS Config if you are using CMS config.
- Add 'Default Image' by clicking on 'Dateibrowser öffnen (open file browser)' -> select image from the right section list of images -> click on 'Auswahlen (Select)' it will add image. (Please upload image in Files Server first and then select, do not upload image directly. Plese refer ImceFilesServer documentation for more information about how to upload images to CMS).
- Click on 'Event Training Type hinzufügen' to add Event Training type.
- Add 'Training Type' in the Training Type.
- Add 'Booking Url' in the field.
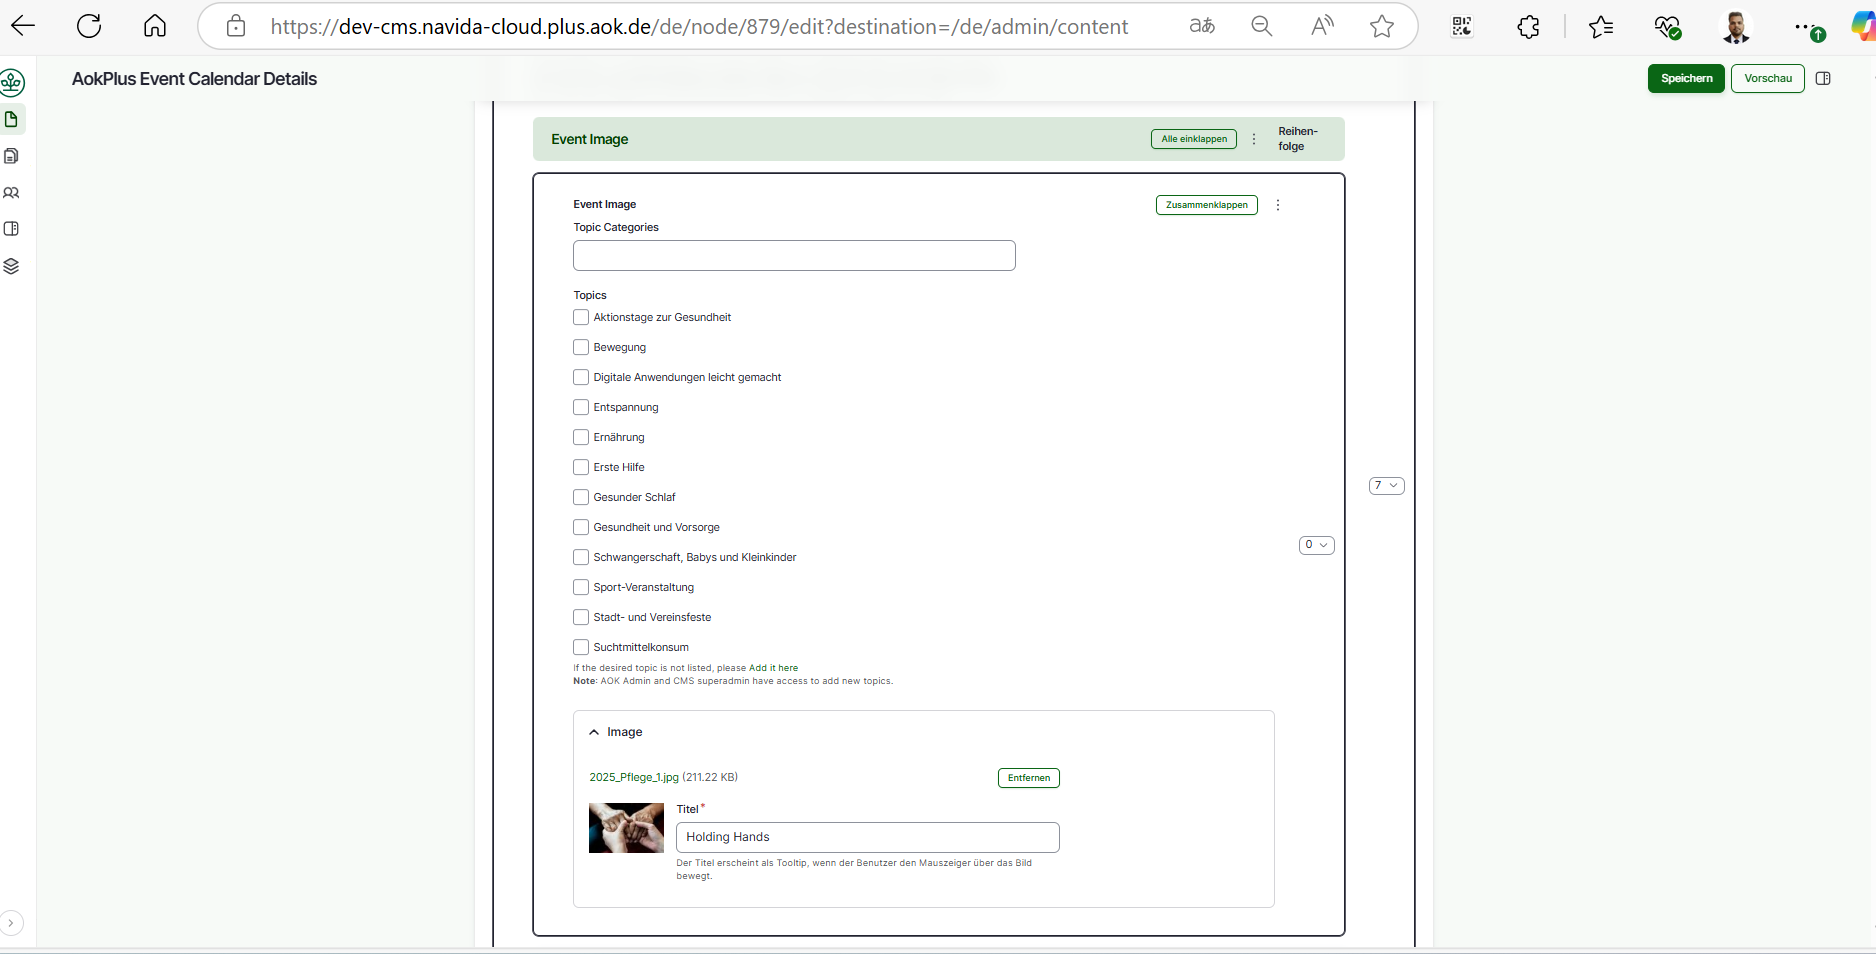
- Click on 'Event Image hinzufugen' to add Event Image.
- Add 'Topic Categories'
- Select 'Topics' from the list. Note : If you don't see the topics listed click on the link to add the topics.
- Add 'Image' by clicking on 'Dateibrowser öffnen (open file browser)' -> select image from the right section list of images -> click on 'Auswahlen (Select)' it will add image. (Please upload image in Files Server first and then select, do not upload image directly. Plese refer ImceFilesServer documentation for more information about how to upload images to CMS).
- Add image title in 'Titel'.
- Click on Speichern (Published) button at top to save the page.
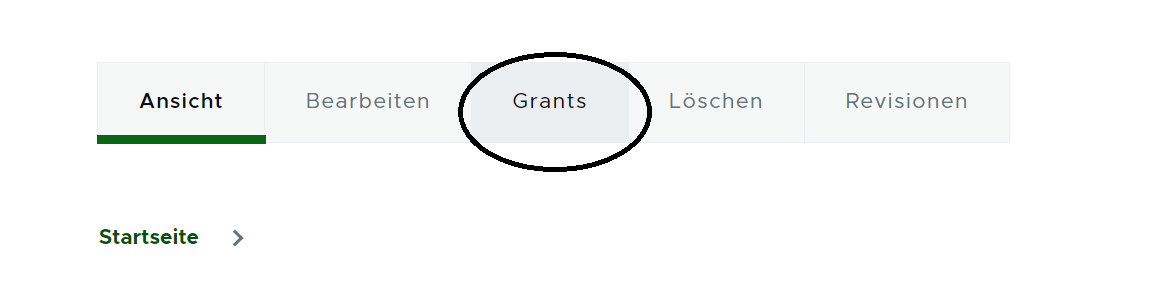
- We need to provide grant for the AOK, after published click on Grants tab.
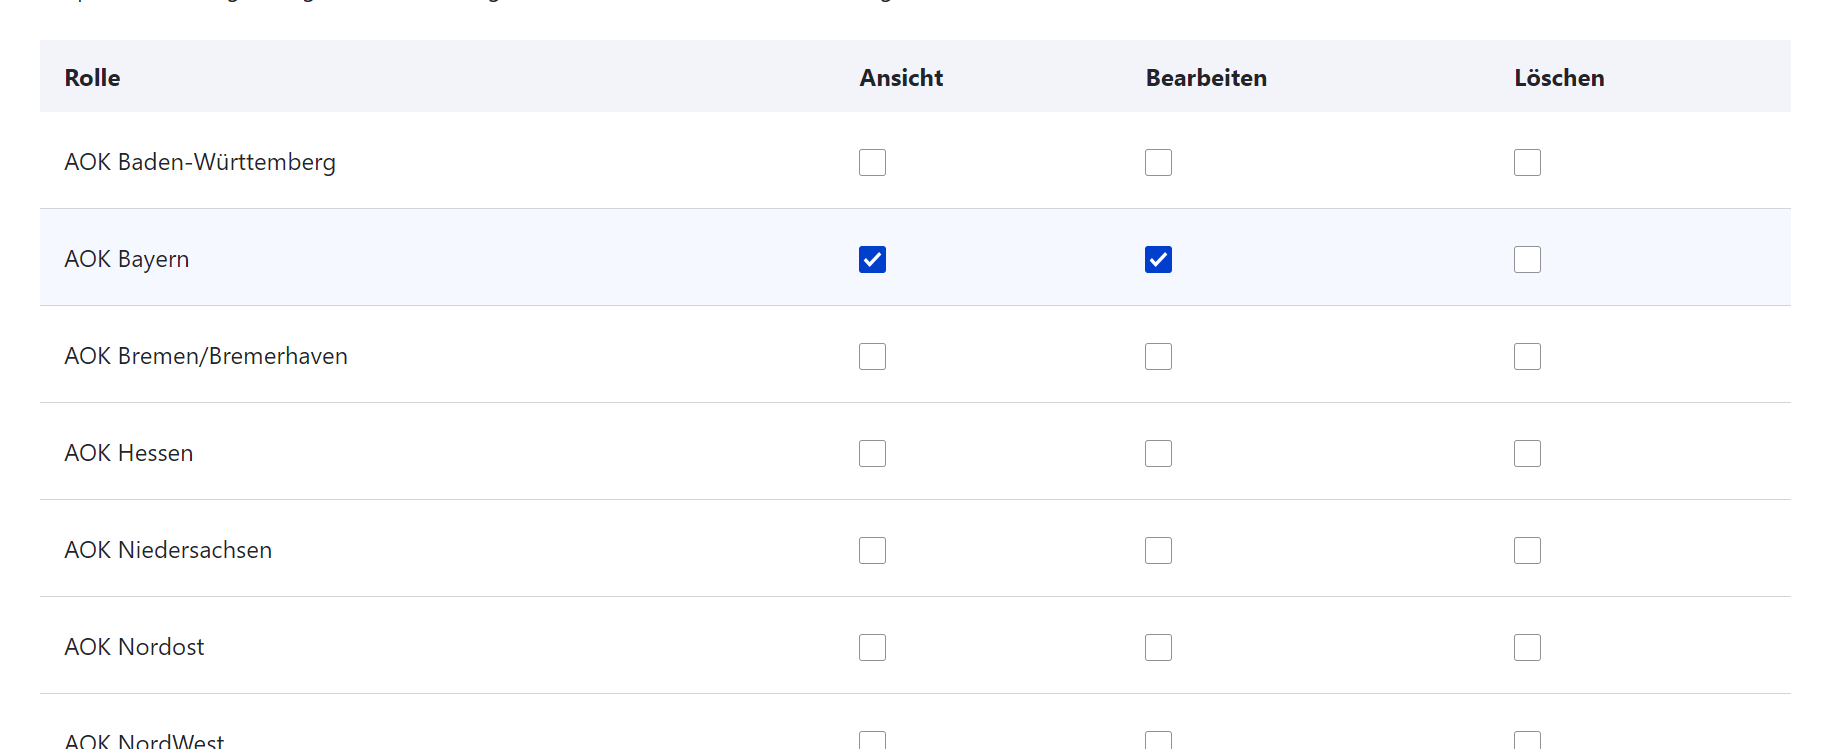
- Give the permission for the Role (Ansicht, Bearbeiten) permission, select the check box and click on 'Save'
Note : Event Calendar is consider as config and content sync will not be used.
Event Calendar Revisions
To find the Event Calendar revisions follow the given steps,
- Click on 'Inhalt(content)'.
- Choose the Event Calendar page to edit (check if Inhaltstype is 'Event Calendar') -> Click on 'Bearbeiten(Edit)' button at right side respective at Titel column.
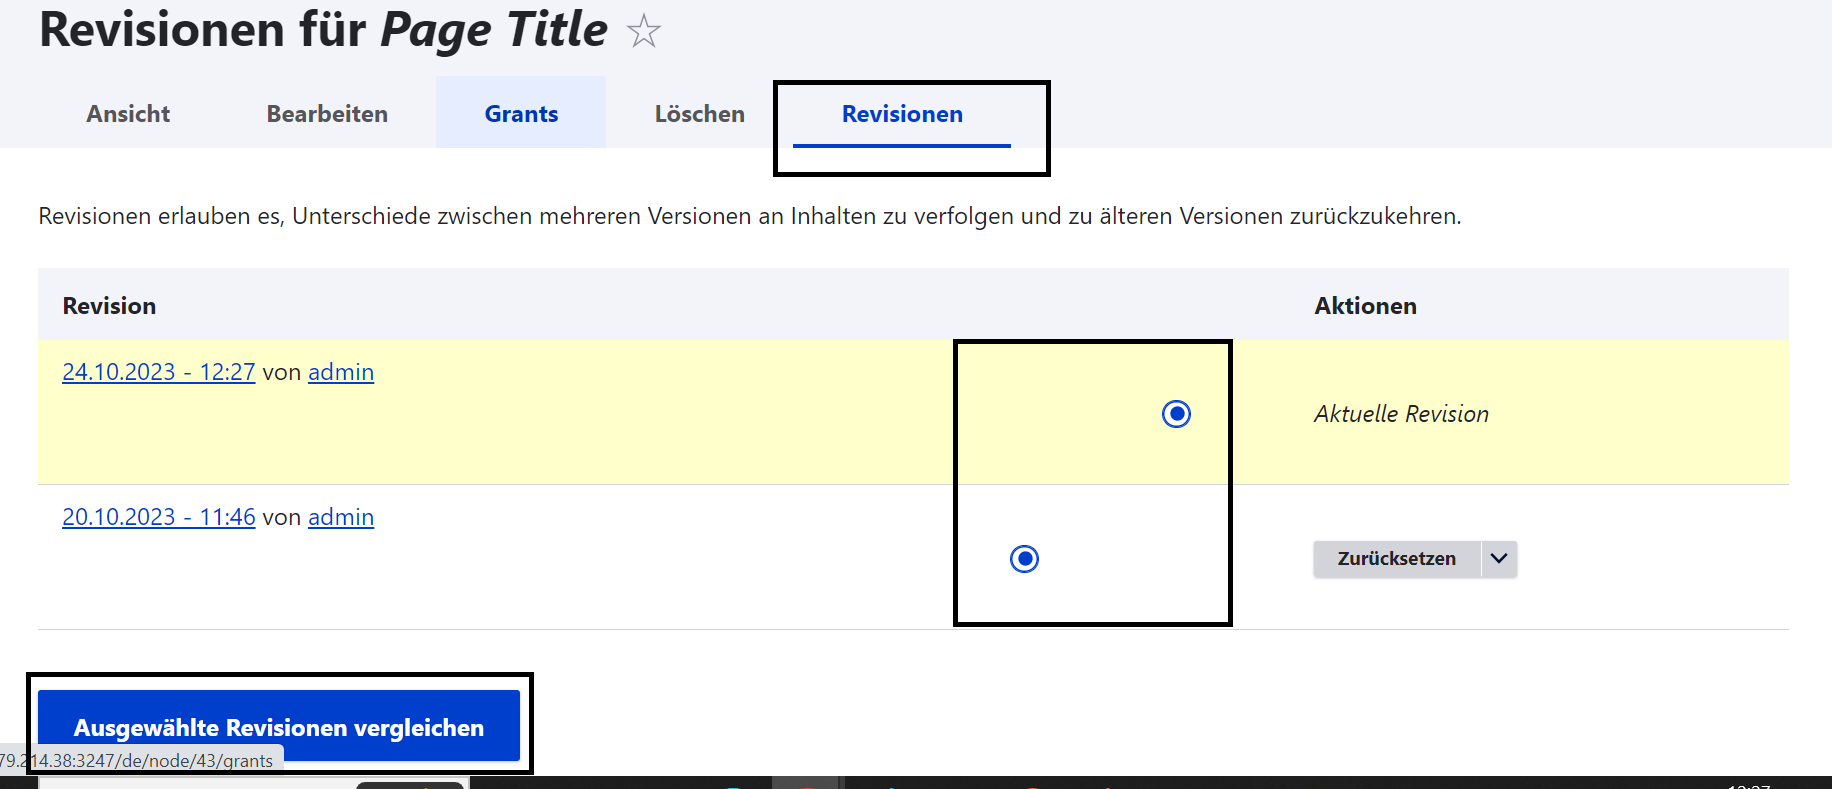
- Click on 'Revisionen(Revision)' tab. It will show all revisions for the Event Calendar.
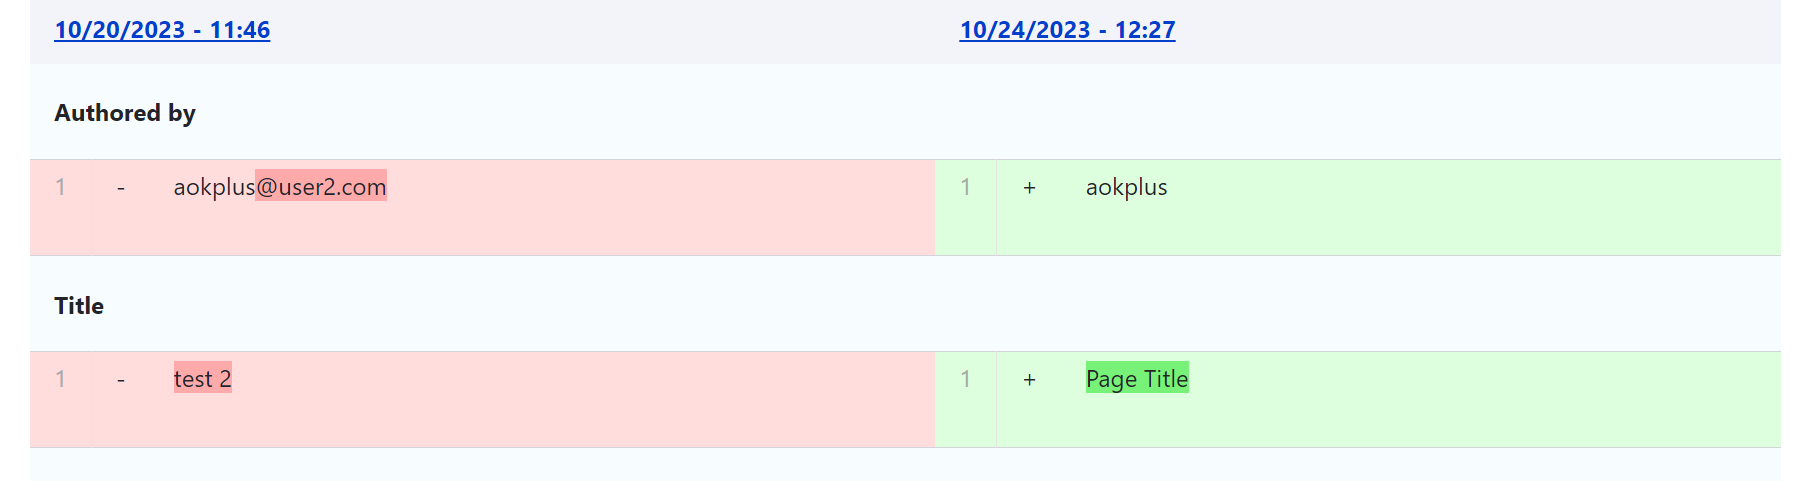
- We can compair the 2 revisions. Select the revisions using radio buttons and click on 'Ausgewählte Revisionen vergleichen(Compare Selected Revisions)' it will give the comparison page 2 revisions side by side. Changes are green colored and current one is red.
 Select
 - We can revert the Event Calendar content to the older version Click on 'Zurücksetzen(revert)' it will revert the consent to the selected revision content.
Edit Event Calendar's
To edit Event Calendar pages follow given steps,
- Click on 'Inhalt(content)'.
- Choose the consent page to edit (check if Inhaltstype is 'Event Calendar') -> Click on 'Bearbeiten(Edit)' button at right side respective at Titel column.
- Edit the page, after editing please make sure 'Vröffentlicht(published)' is chcked.
- Click on 'Speichern(Save)' button.